Are you tired of battling congestion during the cold season? Have you been searching for a natural remedy that can provide soothing relief without any harmful chemicals? Look no further! In this article, I will show you how to easily make your own DIY cold relief vapor rub using natural ingredients that you probably already have in your pantry.
Imagine being able to breathe freely, without relying on over-the-counter medications or expensive remedies. By creating your own natural vapor rub, you can take control of your congestion and find comfort in the healing power of nature. No more relying on artificial ingredients or wondering what you are putting on your skin!
In this step-by-step guide, I will walk you through the process of gathering the ingredients, mixing them together, and storing your homemade vapor rub. You’ll discover the benefits of using a homemade vapor rub, and why it’s a better alternative to commercial chest rubs. Get ready to experience the relief you’ve been longing for.
Key Takeaways:
- Create your own DIY cold relief vapor rub using natural ingredients.
- Relieve congestion and find comfort in the healing power of nature.
- Avoid harmful chemicals and artificial ingredients found in commercial vapor rubs.
- Take control of your congestion and experience the relief you’ve been longing for.
- Save money by making your own natural vapor rub at home.
Understanding the Benefits of a Homemade Vapor Rub
Before we dive into the recipe, let’s explore the incredible benefits of using a homemade vapor rub. This all-natural remedy, crafted with essential oils and other natural ingredients, can provide soothing comfort to your chest and help relieve congestion during the cold and flu season.
Using a homemade vapor rub not only offers a natural alternative to over-the-counter chest rubs but also allows you to customize the blend to suit your preferences and needs. By harnessing the power of essential oils, you can create a personalized chest rub that not only eases congestion but may also offer additional therapeutic benefits.
Here are some of the key benefits of using a homemade vapor rub:
1. Relieves Congestion
The vapor rub’s main purpose is to relieve congestion by opening up the airways and promoting easier breathing. The combination of essential oils used in the rub can help clear mucus and reduce nasal and chest congestion.
2. Soothes Discomfort
When applied to the chest, a homemade vapor rub can provide a soothing and comforting sensation. The gentle warmth and aroma of the essential oils can help ease discomfort, making it easier to relax and sleep better.
3. Natural Ingredients
Unlike commercial vapor rubs that often contain petroleum-based ingredients, a homemade version allows you to use natural components. By using essential oils and other natural ingredients, you can avoid potentially harmful chemicals and enhance the therapeutic benefits of your chest rub.
4. Aromatherapeutic Properties
Many of the essential oils used in homemade vapor rubs have aromatherapeutic properties. These scents can help uplift your mood, promote relaxation, and provide a sense of overall well-being.
5. Versatility
A homemade vapor rub can be customized to suit your individual preferences and needs. You can experiment with different essential oil combinations to create a scent that you find most soothing, making the application of the rub a pleasurable experience.
By understanding the benefits of a homemade vapor rub, you’ll be motivated to embark on the journey of creating your own natural remedy. So, let’s move on to the next section and gather the ingredients needed to make your personalized chest rub.
Gathering the Ingredients for Your DIY Vapor Rub
To make your own DIY cold relief vapor rub, you will need a few key ingredients. These include:
- Coconut oil: Known for its moisturizing properties, coconut oil forms the base of the vapor rub recipe, providing a smooth texture and easy application.
- Eucalyptus essential oil: This powerful oil is commonly used to clear congestion and promote respiratory health.
- Peppermint essential oil: With its refreshing scent, peppermint essential oil helps soothe the airways and provides a cooling sensation.
- Shea butter: Rich in vitamins and antioxidants, shea butter moisturizes and nourishes the skin, making it an ideal ingredient for a homemade vapor rub.
- Beeswax: Beeswax acts as a natural emulsifier, helping to bind the ingredients together and provide a smooth consistency.
These ingredients work together to create a soothing and effective vapor rub that can provide relief from cold symptoms. The combination of eucalyptus and peppermint essential oils helps to open up the airways and alleviate congestion, while coconut oil and shea butter nourish and moisturize the skin.
| Ingredients | Benefits |
|---|---|
| Coconut oil | Moisturizes and provides a smooth texture |
| Eucalyptus essential oil | Clears congestion and promotes respiratory health |
| Peppermint essential oil | Soothes airways and provides a cooling sensation |
| Shea butter | Moisturizes and nourishes the skin |
| Beeswax | Acts as a natural emulsifier and provides a smooth consistency |
Now that you have gathered all the necessary ingredients, you are ready to move on to the next step: making your DIY cold relief vapor rub. But before we proceed, let’s take a moment to understand the benefits of using a homemade vapor rub, which I’ll discuss in the next section.
Making Your DIY Cold Relief Vapor Rub
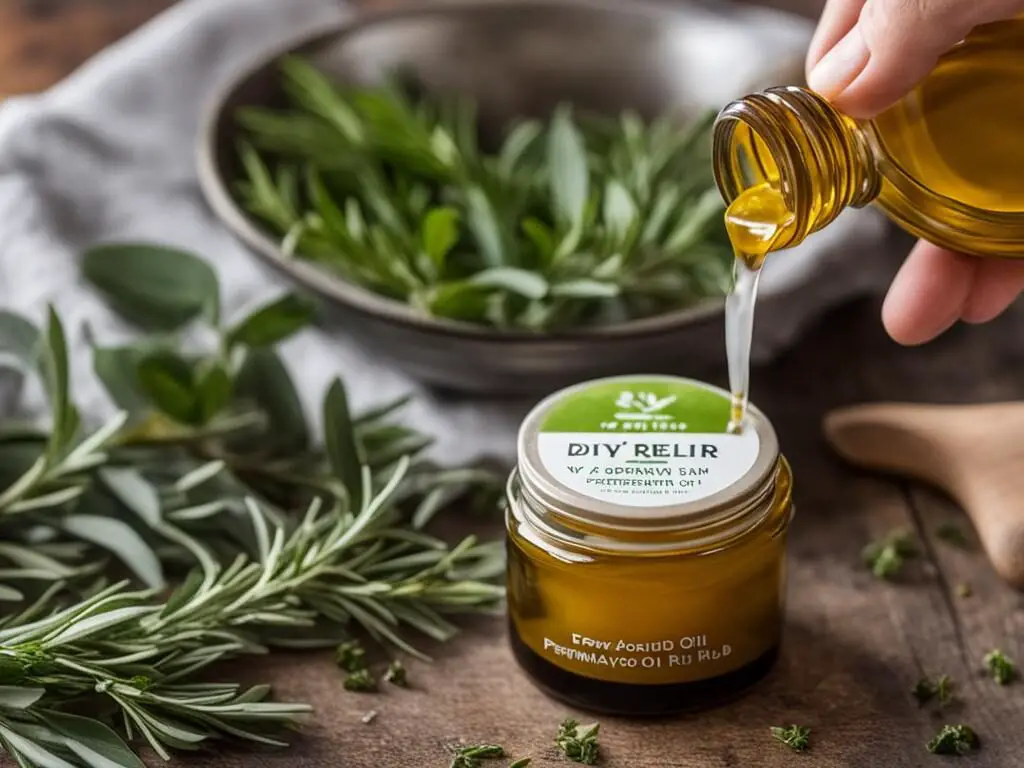
Now it’s time to mix up your homemade vapor rub. In this section, I’ll walk you through the step-by-step process of creating your own cold relief remedy. We’ll explore how to dilute essential oils, add carrier oils like coconut oil or olive oil, and incorporate additional decongestant ingredients like eucalyptus oil and rosemary.
Gathering the Ingredients
Before we start making the vapor rub, let’s gather all the necessary ingredients. You will need:
| Ingredients | Quantity |
|---|---|
| Eucalyptus oil | 10-15 drops |
| Rosemary oil | 5-8 drops |
| Carrier oil (coconut oil, olive oil) | 2 tablespoons |
| Beeswax | 1 tablespoon |
Ensure that you have all these ingredients ready before proceeding with the recipe.
Creating the Homemade Vapor Rub
Now that you have your ingredients, let’s dive into making the DIY cold relief vapor rub:
- In a heat-resistant bowl, combine the carrier oil (coconut oil or olive oil) and beeswax.
- Place the bowl over a double boiler or a saucepan with simmering water. Gently warm the mixture until the beeswax melts, stirring occasionally.
- Once the beeswax has melted, remove the bowl from heat and let it cool slightly.
- Add the eucalyptus oil and rosemary oil to the mixture. Stir well to combine.
- Pour the mixture into a clean, airtight container or jar.
- Allow the vapor rub to cool completely and solidify before use.
There you have it! Your homemade cold relief vapor rub is ready to provide soothing relief from congestion and discomfort.
Note: If you prefer a stronger scent, you can adjust the amount of essential oils according to your preference. However, be cautious not to use too much, as essential oils are potent.
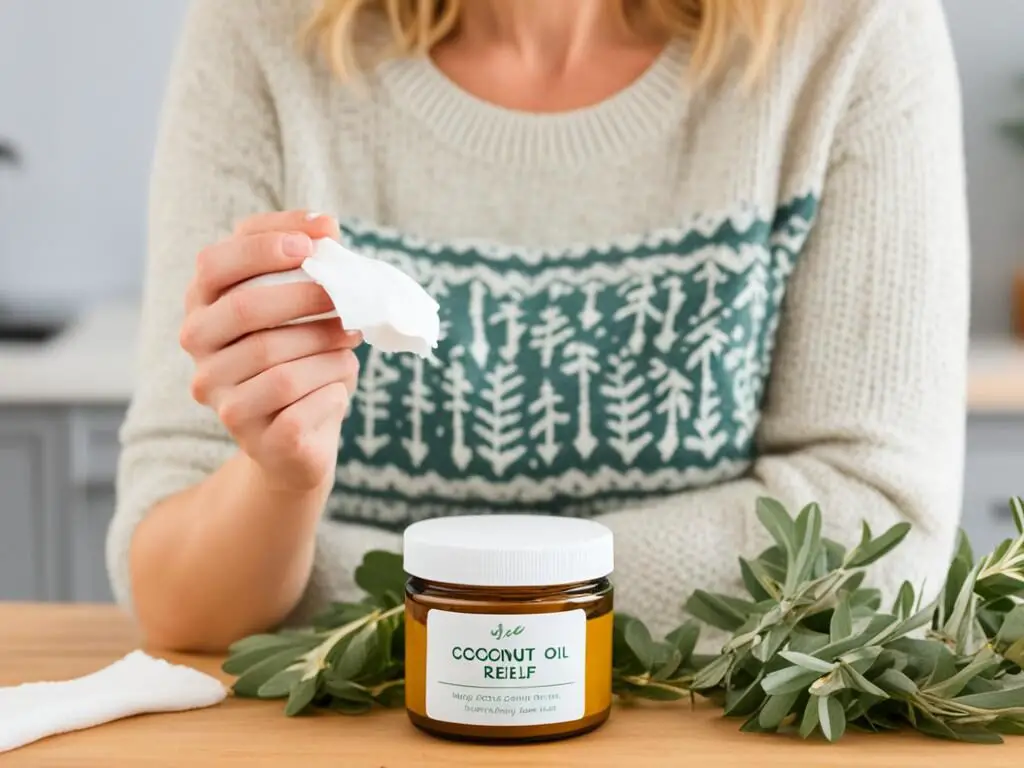
Using and Storing Your Homemade Vapor Rub
Now that your DIY cold relief vapor rub is ready, let me guide you on how to use and store it properly for maximum effectiveness and longevity.
Applying the Vapor Rub
When it comes to sinus and respiratory relief, applying the homemade vapor rub to the chest is the most common method. Simply take a small amount of the rub and gently massage it onto the chest area. The soothing vapors will help alleviate congestion and promote easy breathing.
Utilizing Essential Oils
Essential oils play a vital role in homemade vapor rubs, enhancing their therapeutic properties. Two popular essential oils to consider are tea tree and peppermint. Tea tree oil is known for its antibacterial and antiviral properties, making it beneficial for respiratory health. Peppermint oil, on the other hand, provides a cooling sensation and helps ease nasal congestion.
Combatting Sinus Congestion
If sinus congestion is your main concern, you can take advantage of the respiratory benefits of peppermint essential oil. Dab a small amount of the vapor rub onto your temples, forehead, and under your nose to target sinus-related discomfort. The cooling effect of peppermint oil can help soothe the discomfort associated with a stuffy nose or headache.
Proper Storage for Longevity
To ensure the longevity of your homemade vapor rub, it’s important to store it correctly. Ideally, you should keep it in an airtight container and store it in a cool place away from direct sunlight. This helps preserve the potency of the essential oils and prevents the mixture from melting or becoming too soft. Avoid storing the vapor rub near heat sources or in areas with high humidity, as this can affect its consistency and effectiveness.
By following these tips, you can make the most out of your DIY cold relief vapor rub. Its natural ingredients, such as peppermint essential oil and tea tree oil, can provide the sinus and respiratory relief you need. Remember to always use essential oils safely and consult with a healthcare professional if you have any concerns or specific medical conditions.
Conclusion
Making your own DIY cold relief vapor rub is an easy and cost-effective way to soothe congestion and find relief during the cold season. By using natural ingredients and following this simple recipe, you can create a homemade remedy that is both safe and effective.
Say goodbye to stuffy noses with your homemade vapor rub crafted using this easy homemade vapor rub recipe. Unlike store-bought alternatives that may contain harsh chemicals or artificial additives, this natural vapor rub recipe offers a gentle and holistic approach to relieving congestion.
With homemade cold remedy vapor rub, you can avoid the potential side effects of artificial ingredients and choose the ones that work best for you. Experiment with various essential oils such as eucalyptus or peppermint to customize your homemade vapor rub for congestion relief.
Experience the power of natural cold relief remedies and take control of your well-being. Create your own homemade vapor rub and embrace the comfort it provides.
FAQ
How long does the homemade vapor rub last?
The homemade vapor rub can typically last for several months if stored correctly in a cool place.
Can I use a different carrier oil instead of coconut oil?
Absolutely! Coconut oil is a popular choice due to its moisturizing properties, but you can use other carrier oils like olive oil or sweet almond oil as well.
How often should I apply the vapor rub?
You can apply the vapor rub 2-3 times a day or as needed for relief from congestion. Make sure to massage it onto the chest and avoid applying it to broken or irritated skin.
Is it safe to use the vapor rub on children?
It is important to consult with a pediatrician before using the vapor rub on children, especially infants. Some essential oils may not be suitable for young children, so it’s best to seek professional advice.
Can I add other essential oils to customize the scent?
Yes, you can experiment with other essential oils like lavender or rosemary to customize the scent of your vapor rub. Just make sure to use essential oils that are safe for topical application and dilute them properly.
Can I use the vapor rub for nasal congestion?
While the vapor rub is primarily designed for chest congestion, you can also apply a small amount under the nose to help alleviate nasal congestion. Be cautious not to apply too close to the nostrils to avoid irritation.
Can I use the vapor rub for other respiratory issues?
The vapor rub may provide some relief for common respiratory issues like coughing and sinus congestion. However, it is always recommended to consult with a healthcare professional for proper diagnosis and treatment.
Can I use the vapor rub as a decongestant before bed?
Yes, applying the vapor rub to the chest before bed can help provide relief from congestion and promote better sleep. The soothing scent and ingredients can help ease breathing during the night.
Is the homemade vapor rub safe for pregnant women?
Pregnant women should consult with their healthcare provider before using any homemade remedy, including vapor rub. Certain essential oils may not be suitable during pregnancy, so it’s crucial to seek professional advice.
Can the vapor rub be used for soothing muscle aches?
Before you make your own vapor rub, you need to understand that the primary purpose of the vapor rub is to relieve congestion, the soothing properties of the ingredients may also provide temporary relief for minor muscle aches. However, it is not a substitute for proper medical treatment.
How do I customize my homemade vapor rub?
You can customize your homemade vapor rub by using different essential oil combinations. Some popular options are substituting eucalyptus oil with tea tree oil or adding soothing oils like lavender. Just avoid any oils that contain camphor or petroleum-based ingredients.
What if I want to make a vapor rub without petroleum jelly?
A great alternative to petroleum jelly is to use a natural wax like beeswax in your homemade vapor rub recipe. The beeswax provides a similar thick, emulsified texture without the petroleum. Other plant-based thickeners like shea butter also work well.
Is it safe to use camphor in a homemade vapor rub?
It’s best to avoid using camphor essential oil in homemade vapor rubs, especially for children. Camphor can be toxic if used incorrectly. Instead, rely on natural decongestants like eucalyptus, peppermint, and rosemary oils which provide relief safely.
How should I store my homemade vapor rub?
To maximize the shelf life of your homemade vapor rub, you have to store in a cool airtight container dark place away from heat and sunlight. The fridge is an ideal storage spot. Proper storage prevents the essential oils from losing their potency.
Can I make a large batch of homemade vapor rub at once?
Yes, you can safely make a larger batch of homemade vapor rub to have on hand. Just ensure you store it properly in the fridge in an airtight container. It should keep for several months when you make and store it correctly.
Does a DIY vapor rub expire?
If stored properly in an airtight container in a cool, dark place, your homemade vapor rub can last about 6 months before its potency starts to fade. If you notice a change in scent or texture, it’s time to make a fresh batch.
What’s the best way to use up older homemade vapor rub?
If your homemade vapor rub is older but still safe, you can use it up quicker by making aromatherapy inhalers. Add some into inhaler tubes with cotton pads to sniff congestion relief on the go. You can also add it to baths or mix into body lotion.